![]() Create your first account:
Create your first account:
The first time you open Thunderbird, the Account Wizard launches. The Account Wizard walks you through creating your first e-mail account. The following tutorial explains this process.
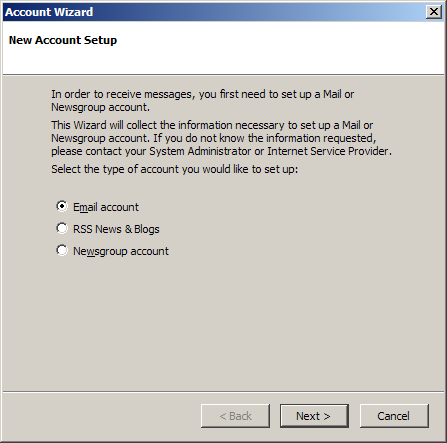
New Account Setup:
Select Email account.
Click the Next button.
Identity:
Your Name =
Enter your name.
Email Address = Enter your e-mail address.
Click the Next button.

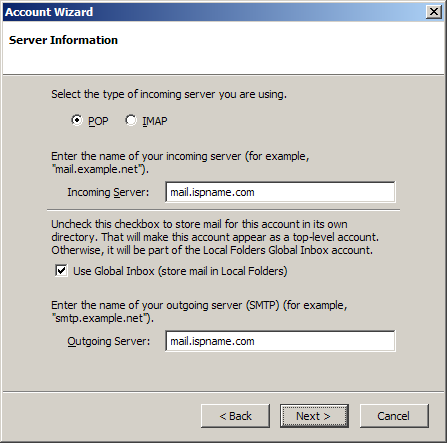
Server Information:
Select POP.
Incoming Server =
The Incoming (POP3) mail server usually follows this format: mail.ispname.com
(or .net). Replace the "ispname.com
(or .net)" with your ISP's name.
If you plan on creating more than one account, you can choose to have a
global inbox or a separate inbox for each account you create.
Outgoing Server =
The Outgoing (SMTP) mail server usually follows this format: mail.ispname.com
(or
.net). Replace the "ispname.com
(or .net)" with your ISP's name.
Click the Next button.
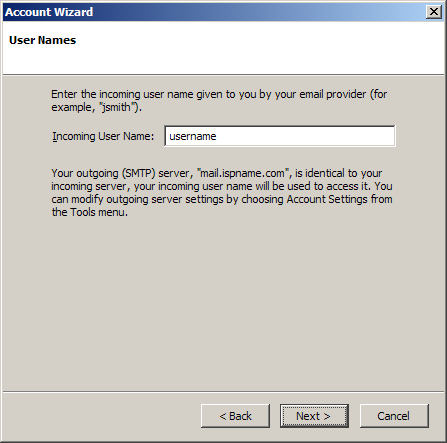
User Names:
Incoming User Name = Enter the username to your e-mail address. The username is the first part of your e-mail address.
Click the Next button.
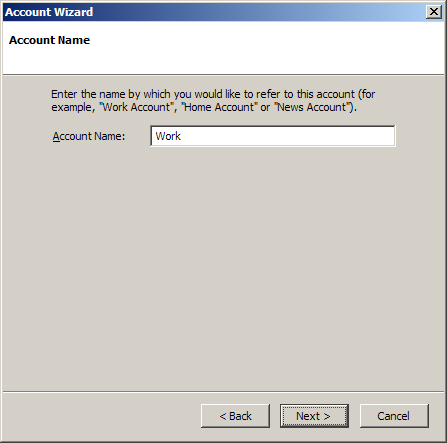
Account Name:
Account Name = Name the account. It can be anything you wish.
Click the Next button.
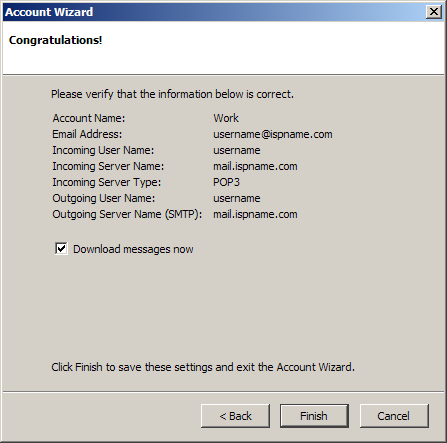
Congratulations!
You're done.
Click the Finish button.
Links: Return to top