 Creating new e-mail accounts:
Creating new e-mail accounts:
To create a new e-mail account, do the following:
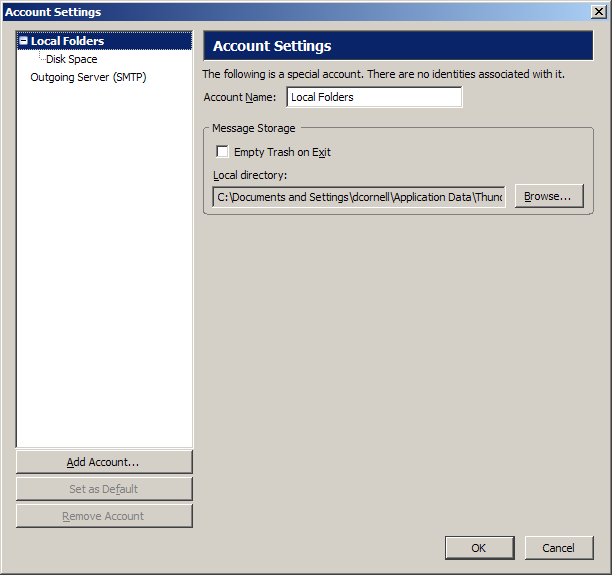
On the Toolbar, click Tools and select Account Settings from the menu.

The Account Settings window opens.
This is where you would go to edit an account as well as create one.
Click the Add Account button.
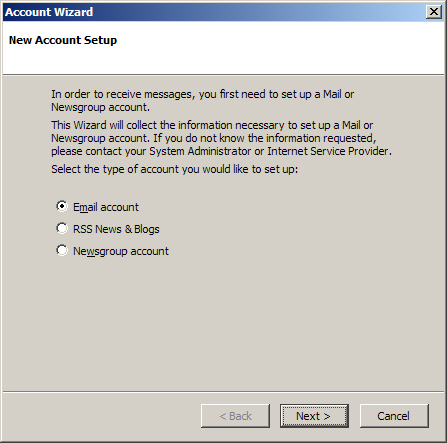
Select Email account.
Click Next to continue.
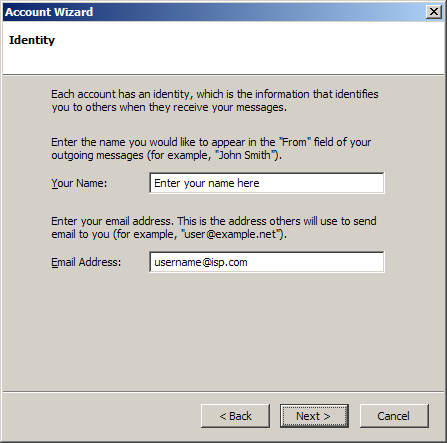
Your Name =
Enter your name.
Email Address = Enter the e-mail
address of the account.
Click Next to continue.
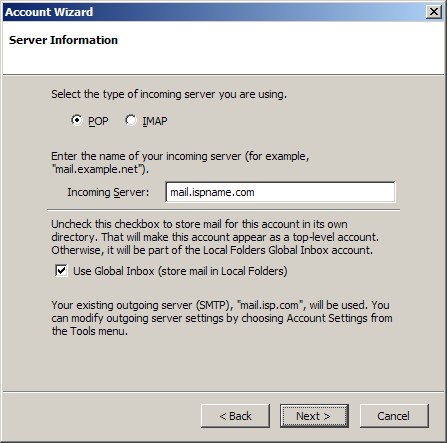
Select POP.
Incoming Server = The Incoming (POP3) mail server usually follows this format: mail.ispname.com (or .net). Replace the "ispname.com (or .net)" with your ISP's name.
Click Next to continue.
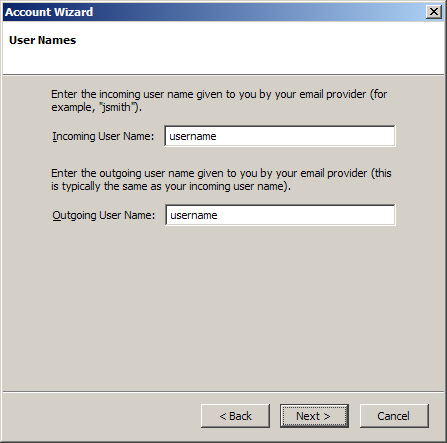
Incoming User Name =
Enter your e-mail username (everything before the @).
Outgoing User Name =
Enter your e-mail username (everything before the @).
Click Next to continue.
Account Name = Enter a name for the account. It can be anything you wish. Make is distinctive to help distinguish it from any other accounts you may create.
Click Next to continue.

Review the information you entered. Click Back to change any erroneous information.
Click Finish to complete the wizard.

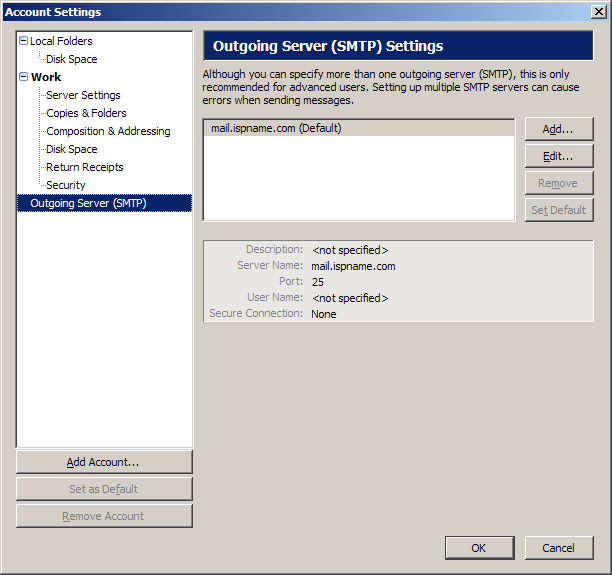
SMTP authentication is required to send e-mail and without this enabled, you cannot send e-mail. SMTP authentication helps deter would-be spammers from spamming you. SMTP authentication is as simple as entering a username and a password. Do the following:
Highlight Outgoing Server (SMTP).
To the right, highlight the new account and click the Edit button.
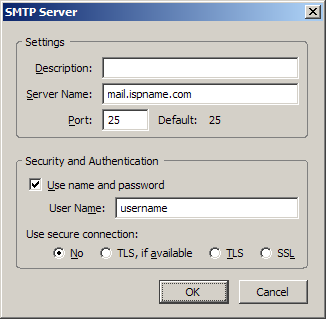
Server Name =
The Outgoing (SMTP) mail server usually follows this format: mail.ispname.com
(or
.net). Replace the "ispname.com
(or .net)" with your ISP's name.
Port = The default port number is perfect:
25.
Check the box Use name and password.
User Name =
Enter your e-mail username (everything before the @).
Thunderbird asks for you password the first time you send e-mail. You can then choose to save your password.
That's it.
Click the OK button to close the window.
Links: Return to top