![]() Creating message filters:
Creating message filters:
Message filters can help you organize your e-mail messages as well as delete unwanted messages automatically. They work in conjunction with folders. To learn how to create folders, click the 'Folders' link above.
In this example we'll create a message filter that will allow SeaMonkey to automatically send e-mail to a specified folder.
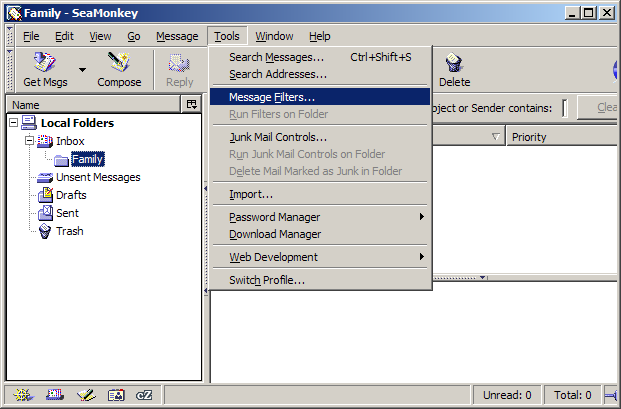
On the Toolbar, click Tools and select Message Filters from the menu.
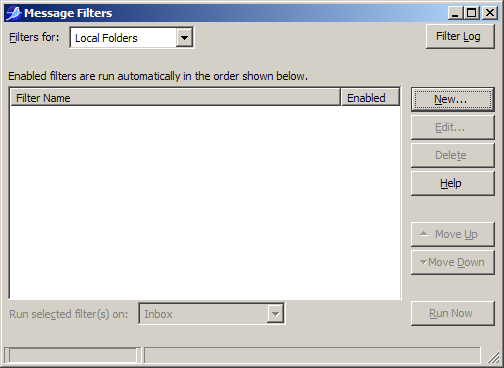
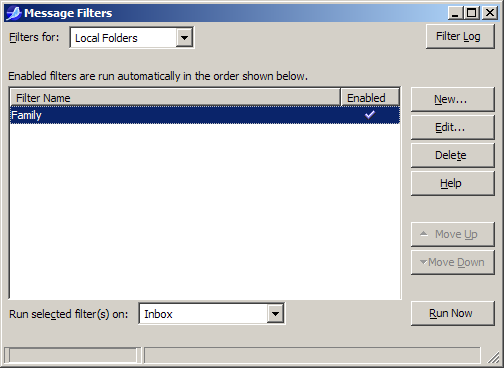
The Message Filter window appears.
Click the New button.
Filter name = Give the filter a name. Make it distinctive, especially if you plan on creating other filters.
Under For incoming messages which, select Match any of the following.
Note the three fields.
In the first field, I selected Sender from the menu.
In the second field, I selected contains.
In the third field, I typed grandma@ispname.com.
Note: Click the Plus (+) button to add additional conditions.
This means that when the 'Sender' field of an e-mail 'contains' 'grandma@ispname.com', SeaMonkey will do something with it. We'll tell SeaMonkey what to do with it in the next screenshot.
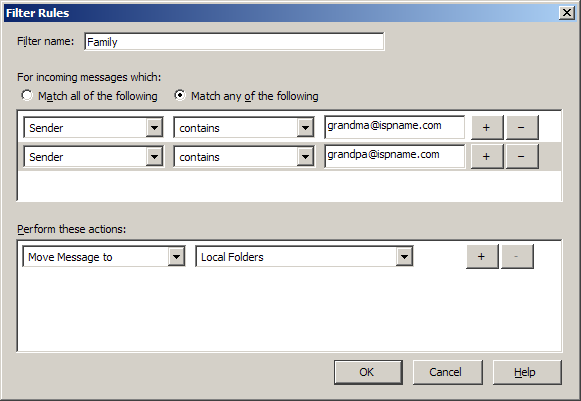
Now we'll tell SeaMonkey to perform a specific action.
Under Perform these actions, I selected
the option Move Message to.
From the drop-down menu to the
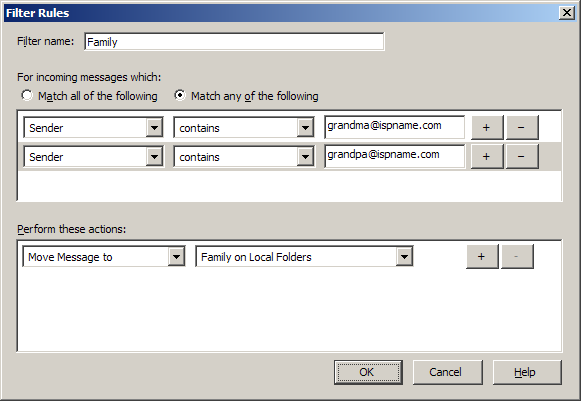
right, I clicked the down-arrow, selected Work -> Inbox ->
Family.
Now whenever I receive an e-mail from 'grandma' or 'grandpa', SeaMonkey will automatically send it to my Family folder.
Note: You can also have SeaMonkey delete automatically certain e-mails that you don't want to see.
Click the OK button to save the filter.
The window now displays the newly created message filter.
From this window you can create, modify, and remove any filters. Create as many as you need.
When finished, close the window.
Links: Return to top