![]() Editing an existing e-mail account:
Editing an existing e-mail account:
To edit an existing e-mail account, follow these steps:
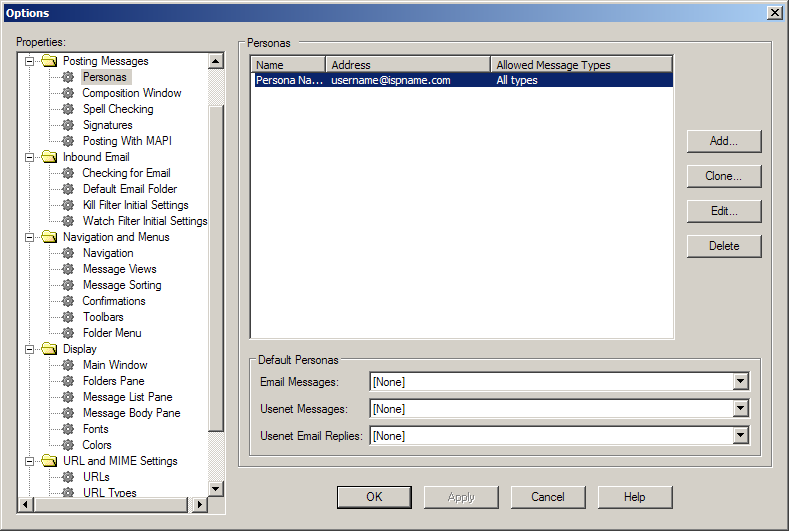
On the Toolbar, click Tools and select Options from the menu.

The Options window appears.
In the Properties column, expand Posting Messages and highlight Personas.
Personas:
Highlight you persona and click the edit button.
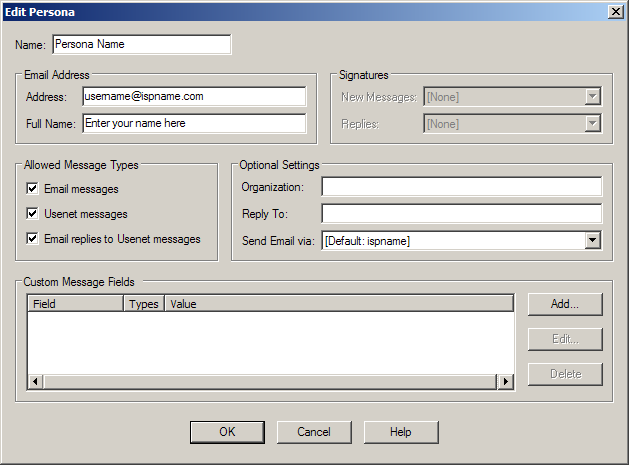
The Edit Persona window appears.
Name: Give the persona a name.
Email Address:
Address: Enter your e-mail address.
Full Name: Enter your name.
Allowed Message Types:
To allow Agent to send and receive messages with this persona, select the option Email messages.
Click the OK button to close the window.
We return to the Options window.
Click the OK button to close the window.
Now let's edit the incoming and outgoing server settings.
On the Toolbar, click Tools and select Servers and Accounts from the menu.
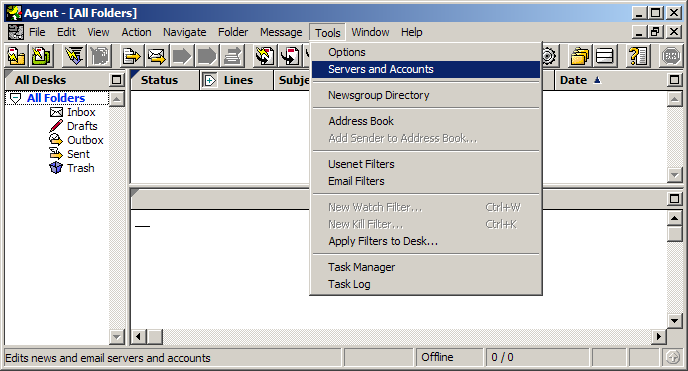
The Servers and Accounts window appears.
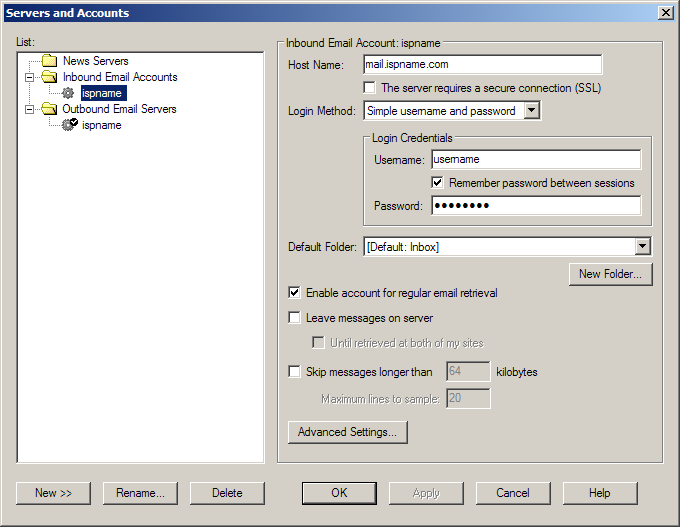
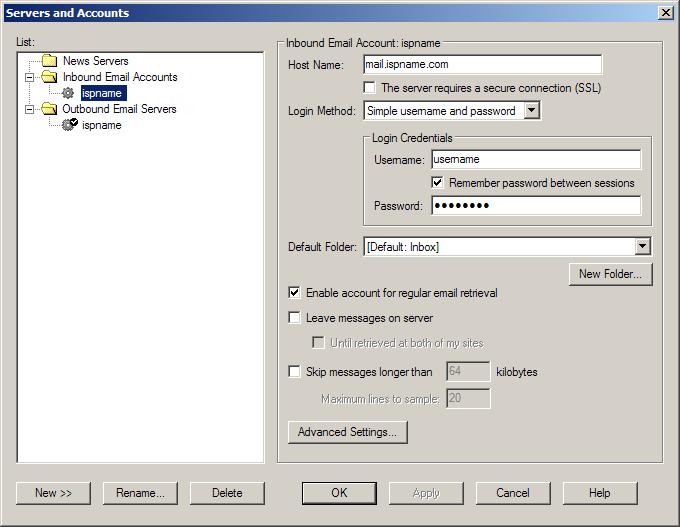
In the List column, expand Inbound Email Accounts and highlight the server you'd like to edit.
Inbound Email Account: "Account name":
Host Name: Enter the name address of the
incoming POP3 server. Most ISPs follow this format: mail.ispname.com (or .net).
Login Method: Select Simple username and password for
the menu.
Login Credentials:
Username:
Enter your e-mail username (everything before the @).
Password: Retype your password.
Ensure you select the option Enable account for regular email retrieval.
Click the Advanced Settings button.
This window appears:
We use the standard incoming port of 110. Ensure this port is selected.
Click the OK button.

SMTP authentication is required to send e-mail and without this enabled, you will not be able to send e-mail. SMTP authentication helps deter would-be spammers from spamming you. It is as simple as entering a username and a password.
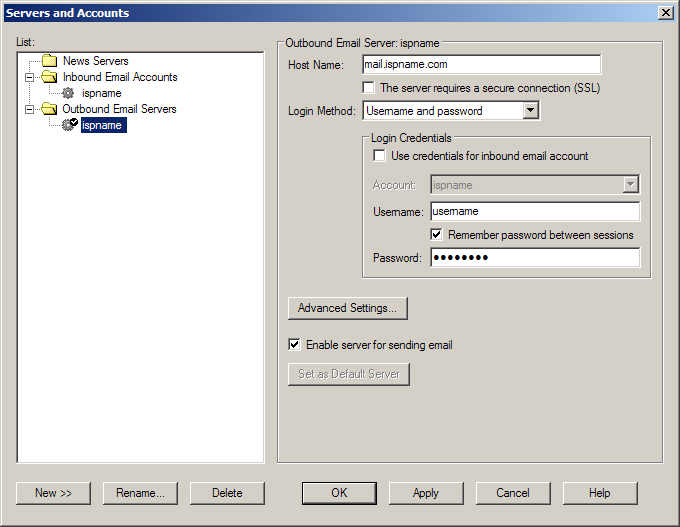
In the List column, expand Outbound Email Servers and highlight the server you'd like to edit.
Outbound Email Server: "Account name":
Host Name: Enter the name address of the
outgoing SMTP server. Most ISPs follow this format: mail.ispname.com (or .net).
Login Method: Select Simple username and password for
the menu.
Login Credentials:
Username:
Enter your e-mail username (everything before the @).
Password: Retype your password.
Ensure you select the option Enable server for sending email.
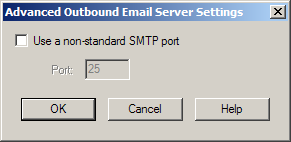
Click the Advanced Settings button.
This window appears:
We use the standard outgoing port of 25. This port should be used unless your ISP says otherwise.
Click the OK button.
We return to the Servers and Accounts window.
Click the OK button to close the window.
Links: Return to top