Creating a new e-mail account:
FreeAgent is freeware; however, upon purchasing FreeAgent, you receive a license code. When you enter the code, you get Agent which gives you e-mail functionality. The following tutorial shows you how to configure a new e-mail account in Agent. Follow these steps:
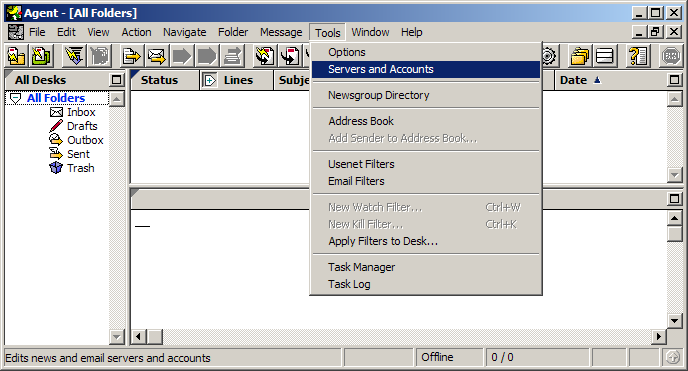
On the Toolbar, click Tools and select Servers and Accounts from the menu.
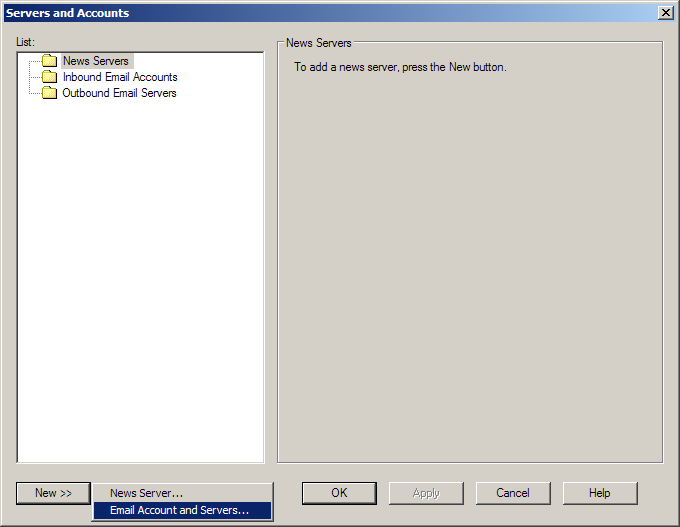
The Servers and Accounts window opens.
In the bottom, left-hand corner, click the New button and select Email Account and Servers from the menu.
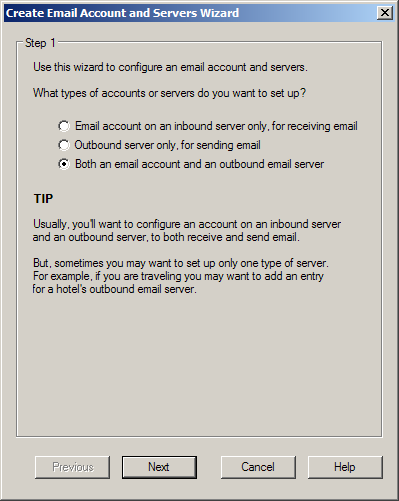
The Create Email Account and Servers Wizard appears.
Step 1:
What types of accounts or servers do you want to set up? Select the option Both an email account and an outbound email server.
Click the Next button.
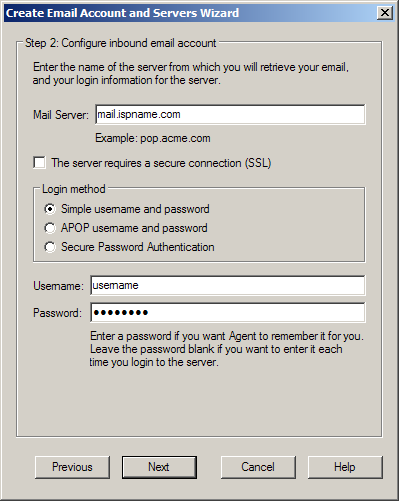
Step 2: Configure inbound email account:
Mail Server =
The Incoming (POP3) mail server usually follows this format: mail.ispname.com
(or .net). Replace the "ispname.com
(or .net)" with your ISP's name.
Login Method
= Select Simple username and password.
Username
=
Enter your e-mail username (everything before the @).
Check the box Remember password between sessions.
Password = Enter your e-mail account password.
Important: Passwords are case-sensitive. Ensure the Caps Lock key is NOT enabled.
Click the Next button.
SMTP authentication is required to send e-mail and without this enabled, you will not be able to send e-mail. SMTP authentication helps deter would-be spammers from spamming you. It is as simple as entering a username and a password.
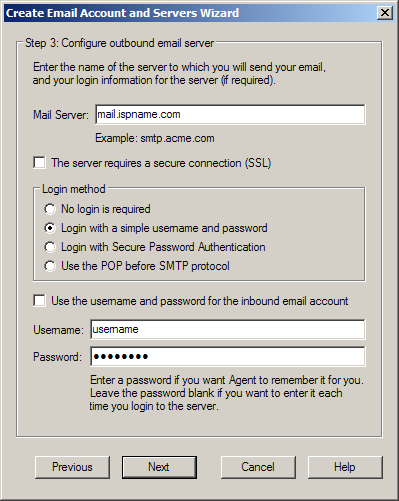
Step 3: Configure outbound email server:
Host Name =
The Outgoing (SMTP) mail server usually follows this format: mail.ispname.com
(or
.net). Replace the "ispname.com
(or .net)" with your ISP's name.
Login Method
= Select Login with a simple username and password from the menu.
Username
=
Enter your e-mail username (everything before the @).
Password
= Enter your e-mail account password.
Important: Passwords are case-sensitive. Ensure the Caps Lock key is NOT enabled.
Click the Next button.
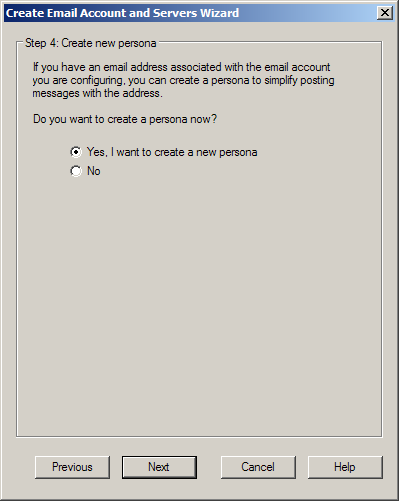
Step 4: Create new persona:
Do you want to create a persona now? Select the option Yes, I want to create a new persona.
Click the Next button.
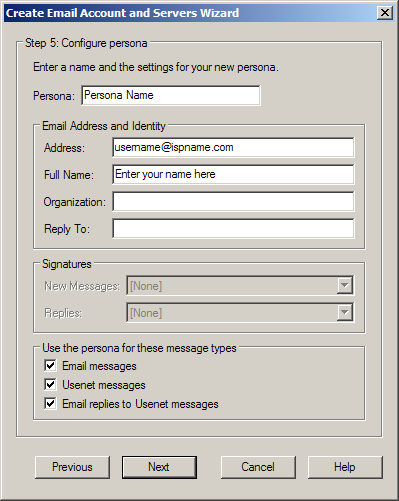
Step 5: Configure persona:
Persona = Give the persona a name.
Email Address and Identity:
Address = Enter your e-mail
address.
Full Name = Enter your name.
Use the persona for these message types: Select the option(s) you'd like for this persona to manage. If you want to use the name and e-mail address you just entered for sending e-mail and/or posting newsgroups, select the options below.
Click the Next button.
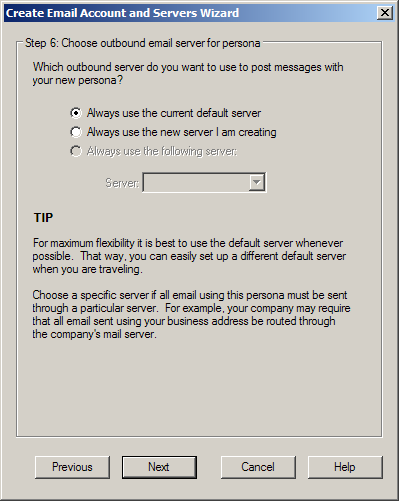
Step 6: Choose outbound email server for persona:
Which outbound server do you want to use to post messages with your new persona? Select the option Always use the current default server.
Click the Next button.
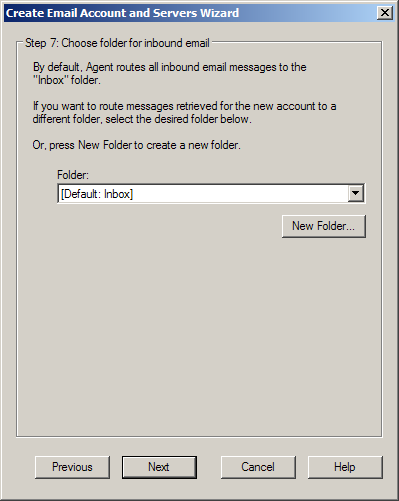
Step 7: Choose folder for inbound email:
Folder = Agent will send all incoming messages to the Inbox unless you specify otherwise. To select a different folder, click the New Folder button and browse to the folder in which you'd like to store your messages.
Click the Next button.
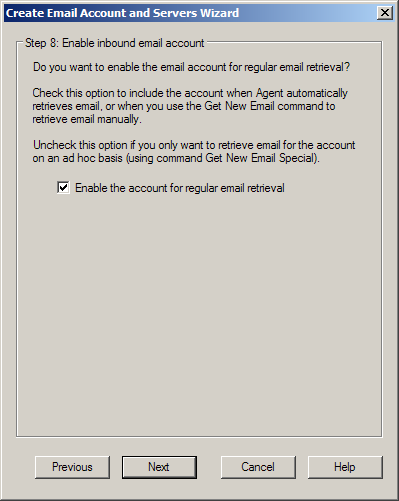
Step 8: Enable inbound email account:
Select the option Enable the account for regular email retrieval.
Click the Next button.
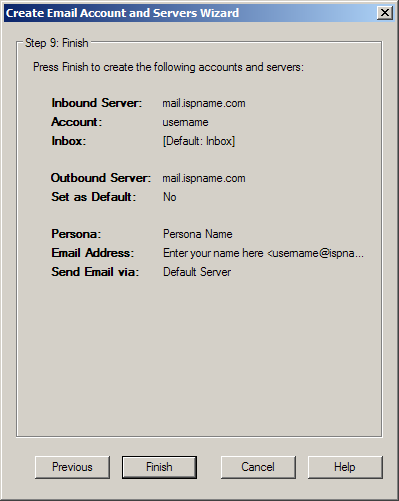
Step 9: Finish:
Check the settings to verify if they're correct. Click the Previous button if you need to make changes.
Click the Finished to close the wizard.
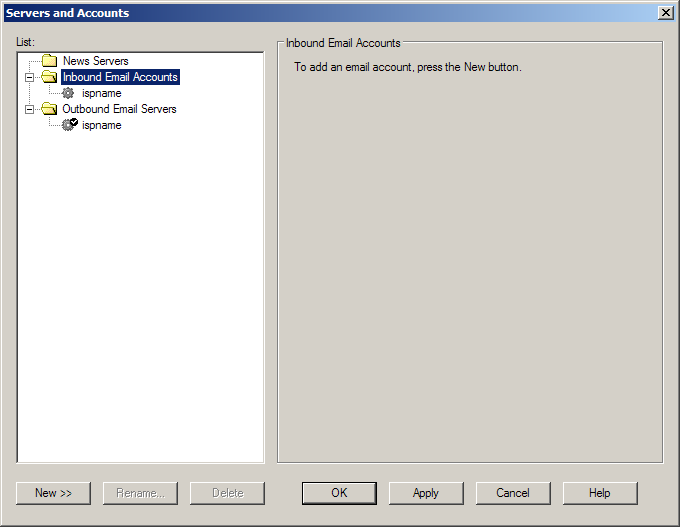
We return to the Servers and Accounts window.
That's it. You're done.
Click the OK button to close the window.
Links: Return to top